

Table of Contents
- Prepare Your Skin Before Foundation
- Match Your Foundation Shade to Your Skin Tone
- How to Apply Foundation with a Brush
- How to Apply Foundation with a Sponge
- How to Cover Hyperpigmentation with Foundation
- How to Prevent Foundation from Looking Cakey
- Achieve a Natural Finish with the Right Technique
- Conclusion
- Frequently Asked Questions
Last Updated: October 5, 2026
Prepare Your Skin Before Foundation
Your skin prep determines whether your base looks flawless or patchy. Skip it, and even the best foundation will highlight every dry spot and uneven texture.
Start with a clean face. Use a gentle cleanser that won't strip your skin, and pat dry rather than rubbing.
Next, apply moisturizer. This is non-negotiable, especially for sensitive skin, a hydrated base helps foundation glide on smoothly and blend evenly.
Wait two to three minutes for your moisturizer to set. This prevents foundation from sliding around or looking streaky.
Oily skin calls for a lightweight moisturizer; dry skin, a richer formula. The goal is balance, comfortable, not greasy or tight.
Consider a primer if your skin is textured or uneven, it creates a smooth canvas and extends wear.
| Skin Prep Step | Purpose | Timing |
|---|---|---|
| Cleanse | Remove dirt and oil | First |
| Moisturize | Hydrate and smooth | Second |
| Wait | Let products absorb | 2-3 minutes |
| Primer (optional) | Smooth texture, extend wear | Last |
Match Your Foundation Shade to Your Skin Tone
Getting your shade right is the most important decision you'll make. Too light looks ashy; too dark sits on top of your skin like a mask.
Your undertone matters as much as your depth. Melanated skin has warm, cool, neutral, or olive undertones, sometimes a mix. Jewelry and vein tests aren't reliable for deeper skin tones.
At LUV + CO., we developed our Melanin Match Liquid Foundation in 16 shades across warm, cool, neutral, and olive undertones specifically because standard shade-matching doesn't work for melanated skin.

Test your shade on your jawline in natural light, not fluorescent store lighting. Your jaw should blend seamlessly into your neck; if you see a line, the shade is off.
Your skin tone can shift with the seasons, deeper in summer, lighter in winter. You might need two shades to stay matched year-round.
How to Apply Foundation with a Brush
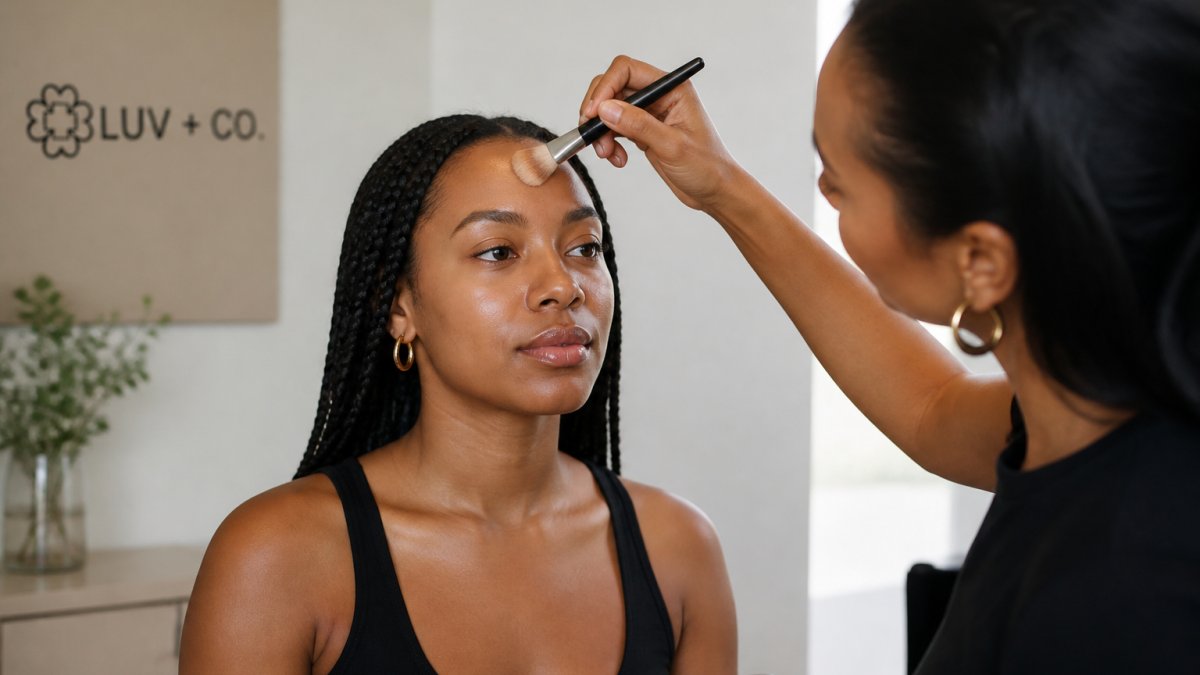
A foundation brush gives you the most control of any tool, best for a polished but skin-like finish, targeted areas, or oily skin that needs long wear.
Pick the right brush for the finish you want
Not all foundation brushes behave the same way. The head shape and bristle density change both the coverage and the finish:
| Brush type | Bristle feel | Coverage | Best finish | Best for |
|---|---|---|---|---|
| Flat, dense kabuki | Firm, tightly packed | Medium to full | Smooth, polished | Oily skin, areas needing coverage |
| Buffing brush | Dense, slightly flexible | Medium, buildable | Soft-focus, airbrushed | Combination and normal skin |
| Duo-fiber or stippling brush | Sparse, two-length fibers | Sheer to light | Natural, diffused | Dry skin, anyone chasing a no-makeup look |
| Small detail brush | Compact, tapered | Targeted | Seamless spot work | Around the nose, under the eyes |
For a natural look, a duo-fiber or buffing brush usually beats a flat kabuki, sparser bristles pick up less product per dip, making over-application much harder.
Choose synthetic bristles over natural hair. They don't absorb cream or liquid foundation the way animal hair does, so more product ends up on your face, and they're easier to clean and less likely to irritate reactive skin.
The technique, step by step
- Dispense a small amount. Start with a pea-sized dot on the back of your hand or a clean mixing palette. Warming it on your hand also helps it spread more evenly.
- Dip, then tap off the excess. Lightly touch the bristles to the product, then tap the brush against your hand once. A loaded brush is the fastest route to a cakey finish.
- Start at the center of your face. Apply to the forehead and cheeks first with light, downward strokes. These are the areas that need the most coverage.
- Blend outward toward the hairline and jaw. Use short, feathering motions rather than long sweeps. Long strokes push product into one streak; short ones diffuse it.
- Work the chin and nose last. These areas are smaller and need less product. Whatever is left on the brush is usually enough.
- Build in thin layers. If you want more coverage, let the first layer set for about 30 seconds, then add a second thin pass. Two thin layers look natural; one thick layer looks like a mask.
Pressure and angle matter more than speed
Use the lightest pressure that still moves the product. Pressing hard pushes foundation into fine lines and pores, making it more visible. Hold the brush at roughly a 45-degree angle and let the bristle tips do the work.
Avoid dragging the brush back and forth over the same spot. Overworking foundation is a common cause of patchiness, the product dries and lifts before it can settle.
Adapt the technique to your skin
- Oily skin: A dense buffing brush plus a light layer of setting powder gives the longest wear. Buff in small circles to press the product into the skin rather than laying it on top.
- Dry skin: Use a duo-fiber brush and a hydrating formula. A dense brush on dry skin can lift flakes and make texture more obvious.
- Textured or acne-prone skin: Use a stippling motion, pressing the brush straight down and lifting, rather than sweeping. This covers without disturbing the texture underneath.
- Mature skin: Use the softest brush you own and the lightest pressure. A small detail brush for spot coverage beats a full-face pass, because less product settling into lines means a more natural result.
Cleaning keeps the finish consistent
A brush that hasn't been washed in weeks holds old product, oil, and bacteria, which makes foundation apply unevenly and can trigger breakouts. Wash synthetic brushes about once a week with gentle soap or brush cleanser, reshape the bristles, and dry them flat with the head slightly lower than the handle so water doesn't seep into the ferrule.
How to Apply Foundation with a Sponge
A sponge gives you a softer, more blended finish and is often easier to control than a brush, especially when learning.
Dampen your sponge with water or a hydrating mist, then squeeze out the excess so it's wet but not dripping.
Apply foundation to your face using your fingers or a brush first. This gives you more control over where the product goes.
Now blend with your sponge, pressing gently rather than rubbing. Pressing works foundation into the skin without disturbing the layer underneath.
The LUV + CO. Makeup Blending Sponge is latex-free and designed in melanin-inspired shades.

Blend until no visible edges or lines remain. Your foundation should look like second skin, not a layer sitting on top.
How to Cover Hyperpigmentation with Foundation
Hyperpigmentation needs a different approach than general coverage, enough product to conceal dark spots without looking cakey.
Use a medium-to-full coverage formula. Our Melanin Match HD Cream Foundation + Concealer was designed specifically for this, it provides medium-to-full buildable coverage and works as both foundation and targeted concealer.

Apply your regular foundation first across your entire face. This creates an even base.
Melanin Match Liquid Foundation for Melanated Sensitive Skin →
Next, identify areas with hyperpigmentation, dark spots, uneven patches, or acne scars showing discoloration.
Apply concealer or a thicker foundation formula directly to these spots with a small brush or fingertip, pressing gently into the skin rather than rubbing.
Blend the edges so the concealer melts into your foundation, no visible line where the two meet.
If one layer doesn't fully cover the discoloration, add another thin layer. Two thin layers look more natural than one thick layer.
Set this area with powder to help it last longer and prevent creasing throughout the day.
How to Prevent Foundation from Looking Cakey
Cakey foundation happens when you use too much product or apply it too thickly. It sits on your skin instead of becoming part of it.
The biggest mistake is starting with too much. Use less than you think you need.
Apply in thin layers.
Blend thoroughly, take time to press and blend until the foundation disappears into your skin.
Use the right tools. A damp sponge or soft brush blends better than fingers alone, distributing product more evenly and preventing buildup.
Don't overwork your foundation. Once it's blended, leave it alone, re-blending disturbs the layer and creates patchiness.
Choose a lightweight formula if your skin is oily or textured. Heavier formulas can look thick on these skin types.
Set with a light hand: use a fluffy brush and press powder gently into the skin. Sweeping it on creates a heavy, visible layer.
Achieve a Natural Finish with the Right Technique
Learning how to apply foundation for a natural look means your skin looks like skin, not makeup.
Start with less product than feels right. Your instinct will be to use more. Resist it. Less is always better when chasing a natural look.
Apply from the center of your face outward.
Blend every edge, a visible edge screams "makeup." Feather outward until it disappears into skin and hairline.
Use pressing motions instead of rubbing. Pressing blends without disturbing skin texture; rubbing moves product around and creates streaks.
Skip heavy powder if possible, it can look cakey and matte.
Consider your skin texture. Heavy foundation highlights texture and visible pores; a lightweight, buildable formula works better.
Let your skin show through. The most natural-looking makeup isn't invisible, it's just subtle. You should still see your skin tone and texture underneath.
Conclusion
How to apply foundation for a natural look comes down to three things: prep your skin well, use the right shade, and apply thin layers with thorough blending. Skip any of these and your foundation won't look natural, no matter the product.
The foundation you choose matters too. At LUV + CO., our Melanin Match Liquid Foundation is formulated specifically for melanated, sensitive skin. It provides buildable coverage with a natural matte finish that hydrates rather than dries.
If you're struggling to find your shade, our Melanin Analysis system in our LUV LAB takes the guesswork out of shade matching. Visit us near Atlanta for a personalized consultation, or find your shade online with our shade-matching guide. Your skin deserves makeup that looks like it belongs on you.
Frequently Asked Questions
How do you apply foundation so it looks natural?
Apply foundation in thin layers starting from the center of the face, using either a brush or sponge to blend outward toward the hairline and jawline. Use pressing or dabbing motions rather than rubbing, which helps the product meld with skin instead of sitting on top. Build coverage gradually with small amounts of product, allowing each layer to set before adding more. This approach creates a skin-like finish that looks natural and prevents the heavy, cakey appearance that comes from applying too much product at once.
Should you apply foundation with a brush, sponge, or fingers?
All three methods work, but each gives different results. A brush like the LUV + CO Foundation Makeup Brush provides controlled, even coverage with less product waste. A damp sponge creates a seamless, pressed-in finish that blends edges smoothly. Fingers work well for small, targeted areas but can use more product and may not blend as evenly across larger zones. For a natural finish on melanated skin, many find a damp sponge or soft brush most effective because they allow precise blending without dragging the product.
How can you cover hyperpigmentation without applying foundation all over your face?
Use targeted coverage by applying foundation or a cream concealer only to areas with visible hyperpigmentation, dark spots, or uneven tone. The LUV + CO Melanin Match HD Cream Foundation + Concealer works well for this because it's formulated with concentrated coverage that camouflages discoloration without requiring full-face application. Apply a small amount directly to the affected area, then blend the edges with a sponge or brush so it doesn't look like a patch. This approach lets you address specific concerns while keeping the rest of your face looking fresh and natural.
What makes a foundation look natural versus cakey?
The difference comes down to product amount, formula weight, and blending technique. A natural finish uses less product applied in thin, buildable layers with a lightweight formula that has a skin-like or matte finish without looking flat or dry. Cakey foundation usually results from applying too much product at once, using a heavy formula, or not blending thoroughly. Choosing a foundation designed for your skin type, starting with a small amount, and using pressing motions to blend helps ensure your coverage looks like an extension of your skin rather than a mask sitting on top.